Table of Contents
Introduction
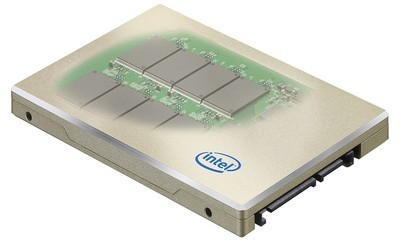
One of the biggest recent improvements in computer performance has been the advent of solid-state drives (called SSDs for short). They are based on the same technology as the flash memory used in camera, phones, and other small electronic devices – but on a larger scale.
This allows for much greater speeds than their smaller counterparts, and because there are no moving parts involved the latency, or time spent waiting for data to be accessed, is almost nonexistent. Because of this performance advantage, SSDs have supplanted traditional hard drives as the best choice for enthusiasts and other demanding computer users.
However, when using a solid-state drive capacity is at a premium. The things that can be most affected by a SSD's speed – the operating system itself, programs, and important files to be edited – need to have priority. There are a lot of other things that are located on the primary drive by default, though, so if you find yourself low on disk space here are some things to try.
Turning off Hibernate & removing the hibernation file
One of the power-saving options in Windows 7 is Hibernation mode. This is a step in-between Sleep, in which the RAM is kept active but the rest of the system is turned off, and a full shutdown. When a computer is set to Hibernate, the data from the RAM is copied over to the primary (C:) drive, and then the computer is shut down. When it boots the next time, the data from the hibernation file is copied back into memory and then the system resumes as if it had come out of sleep mode. It takes longer than entering or resuming from sleep, of course, but saves more power – making it especially popular for laptops, where the normal sleep mode would slowly drain battery life.
The downside it that the hibernation file has to be as large as the amount of RAM you have in your computer. These days that can easily be 8GB, 16GB, or even more – and since it is located on the C: drive, in a system with a SSD it has the potential to eat up lots of drive space.
If you know you are not interested in using this feature, it can easily be disabled; the hibernation file can then also be removed, reclaiming a substantial amount of drive space. Here are instructions from Microsoft for turning Hibernation off in Windows 7 – which also removes the hibernation file at the same time:
1. Click Start, and then type cmd in the Start Search box.
2. In the search results list, right-click Command Prompt, and then click Run as Administrator.
3. When you are prompted by User Account Control, click Continue.
4. At the command prompt, type powercfg.exe /hibernate off, and then press ENTER.
5. Type exit and then press ENTER to close the Command Prompt window.
Adjusting the size or location of the page file
Another Windows feature which can take up a lot of disk space is the page file. This is a section of one of the drives (C: by default) set aside for use as extra memory, in case the system runs low on physical RAM. The Windows default configuration is to set aside an amount of drive space equal to or larger than the size of a computer's physical RAM; for example, a 16GB system would have at least 16GB set aside as a page file.
When space on the C: drive is limited, such as in the case of a small to mid-sized SSD, moving the page file to another drive could be a good option. The downside to that is potential loss of performance: if a traditional hard drive is used instead of a solid-state drive, then when active the page file's performance would be substantially slower. However, in an ideal world the page file should rarely – if ever – be heavily used… so with enough RAM the impact of moving the page file should be minimal.
Similarly, with enough physical memory the page file's size could be reduced or possibly even eliminated entirely. Here are instructions from Microsoft on how to change the size of the page file; to move it, you would do this twice – once creating a new page file on a secondary drive, and then again to remove the page file from the primary drive:
1. Open System by clicking the Start button, clicking Control Panel, clicking System and Maintenance, and then clicking System.
2. In the left pane, click Advanced system settings. If you are prompted for an administrator password or confirmation, type the password or provide confirmation.
3. On the Advanced tab, under Performance, click Settings.
4. Click the Advanced tab, and then, under Virtual memory, click Change.
5. Clear the Automatically manage paging file size for all drives check box.
6. Under Drive [Volume Label], click the drive that contains the paging file you want to change.
7. Click Custom size, type a new size in megabytes in the Initial size (MB) or Maximum size (MB) box, click Set, and then click OK.
Adjusting the amount of space reserved for System Restore
Windows 7 has a few built-in utilities designed to help if something goes wrong with your computer. One of these is System Restore, which creates 'restore points' whenever a major change is made to the computer. Over time, a portion of the C: drive can be filled up with these restore points – up to a certain percentage of the drive (5% by default). Limiting the amount of space they can take up will help keep a SSD from getting too full, and you can also manually remove existing restore points to free up space. If you use other backup methods you could even opt to turn off System Restore entirely.
Here are instructions from Microsoft on how to change System Restore settings, or turn it off entirely:
1. Open System by clicking the Start button , right-clicking Computer, and then clicking Properties.
2. In the left pane, click System protection. If you're prompted for an administrator password or confirmation, type the password or provide confirmation.
3. Under Protection Settings, click the disk, and then click Configure.
4. Adjust the Max Usage slider to set the limit on how much space restore points are able to use, or select Turn off system protection to disable it for the given drive.
Further frequently asked questions about System Restore are addressed here.
Relocating the default user data folders
By default, Windows sets up a series of folders for each user account on a computer. Some of them hold configuration data for programs, but others are designated as the default save locations for various types of files – documents, music, videos, and pictures. Over time those can fill up with a lot of media files, so if a second drive is available in the computer it may be a good idea to relocate the appropriate folders and save space on the primary drive.
There are a few different ways to move those folders, which have differing side effects. We have an article posted about our preferred method for doing this, which is an excellent reference if you want to move your user folders around – it can be found here.
We can also have our technicians set up a new system with those folders adjusted for you ahead of time; if that interests you just let your sales rep know!
Installing programs to a second drive
Ideally the primary drive in a system should have enough space for both Windows and programs, but over time as more software is added you might find yourself in a situation where even some programs would be better off on a second drive. Almost all applications will give an option to control where they are installed, but during the install process it may be necessary to select something like "Advanced Options" or "Customize" in order to access such features.
The Programs and Features section within the Control Panel (known as Add/Remove Programs in earlier versions of Windows) hosts a list of installed programs. The list can be sorted by the size of each program, as well as how often the applications are used. This can be helpful, as it provides an easy way to see what programs are taking up lots of space – making decisions about removing programs or reinstalling them to a second drive easier.
|
|
Relocating the iTunes Music Folder
Many people use iTunes for music playback, storage, and management. If lots of music is purchased through or loaded into iTunes it can take up a substantial amount of drive space. By default such files are saved in a sub-folder in the user's Music directory, but if you want to have all of your media files kept on a second drive instead this will need to be moved (in addition to the user data folders mentioned earlier).
Instructions on how to move the iTunes music folder are available here.
Relocating the Steam Games Folder
Steam is a popular game management and purchasing applications from Valve. It stores all games installed through it in a folder underneath the program itself – so if you install it to your system drive then games in it will also be loaded on that drive. This is ideal for performance on a SSD, but could also cause a computer to run low on space over time. If you find that you would rather have these games installed on a second drive there are two options:
1) Move the entire Steam installation, along with the associated games. This can be done by simply installing Steam to a second drive in the first place, or through instructions from Steam's support department which are available here.
*Update* – January 2013 – The latest version of Steam now supports a feature called "Steam Libraries" for most games, which allows you to set up alternate locations for different games to be installed. This would allow easier use of a SSD primary drive even with a large collection of games, since lower-priority titles could be installed on other drives in the system instead.
2) There is a feature of Windows' NTFS (NT File System) which allows for "junctions" to be created, directing one folder to another. These can be used to point Steam to other folders or drives after manually moving game files. There are guides online that cover how this can be done, and some programs which have been designed to do it for you.
Conclusion
Having a solid-state drive in your computer can be a massive boost to performance and usability, but care must also be taken to avoid running out of room as such drives do not yet have the capacity of traditional hard drives. Hopefully the ideas listed above will help you avoid the pitfalls of a maxed-out drive.
As a parting note, in case you have tried the ideas above and still cannot get disk space under control, there are programs which can help you visualize what is taking up room. One such program is called Space Sniffer, which is freeware and available for download here.
|
|
Please also feel free to share additional ideas in the comments below or on our forums.